Showing posts with label Pandanimal. Show all posts

Tuesday, 7 October 2014

Tree Tuesday


I am going to start my Tree series with the oldest tree in my garden.


A yew tree, Taxus baccata. This tree could well be older than our house. 

 It grows quite close to the church wall and according to old maps of the village a road ran this side of the church as well as on the current side placing the church on an island in the middle.

It is my belief that this part of the garden was once part of the church yard as there is no yew growing there now which is unusual as yew trees are most often planted in church yards so that stock animals can't graze on the poisonous branches. The wood of the yew was needed to make long bows. Maybe the road was added to the garden when the house became the Rectory (which it wasn't always) and part of the church yard was also taken into the garden.

We also have a well close to the yew and too far away from the house to be any real use to the house holders. I think it must of been the village well, this would mean the road ran between the yew and the well and our garden was much smaller!


It is very dark under this tree and not a lot grows in the shade. But this time of year we get this. It is a puff ball fungus, about the size of a football. This one is getting old, a month old or more I would guess. They start white and turn darker with age. When they are ready they are like husks, filled with the finest spores which "puff" out and are carried on the air to new ground to grow.


Friday, 3 October 2014

Choosing Colours.

Choosing colours to work with is often more complicated for a glass artist than for someone using more traditional forms of artistic expression like paint.

Glass has a mind of its own once it begins to melt and the colour you pick when it is in rod form can disappear when heated only to reappear on a second heating or change into something very different depending on how much oxygen is in the flame you use and how much silver is in the glass. 

Mixing colours can yield extraordinary results too, but more often than not ends up with an undesirable black in my experience. This is due to the chemicals in the glass that give it its colour reacting with each other.

Trial and error is often the best way to discover what a glass will do. 


I keep my eyes open for new ways to be inspired to play with colour and recently found Design Seeds

http://design-seeds.com/index.php/home/entry/autumn-hues3


I used this beautiful pallete to create the sets of beads below. Not really pink enough and a touch too yellow. In real life the colours are actually closer. But my lights bring out the yellows. 


The glass colours I chose where :-


Top to bottom, 

CIM Comando
CIM Slytherin
ASK Scarlet Dreams
CIM Pheonix
Eff Sedona
CIM Stonegroud


I thought as a little challenge for myself during Blogtoberfest  I would let my readers choose a colour palette for me to use to create a set of beads as I did at the top of this page. 
Please help me decide between these two colour palettes, also from Design Seeds, by voting "A" or "B" in the comments. I will count the votes on Wednesday and then I will do my best to make another set of beads using the winning pallete as inspiration.  I will report back next friday with my make and offer up another couple of pallettes to vote on.


"A"

"B"

Thank you for reading my blog and for voting, cause I dont think I could choose between these two. 

Julia

Friday, 31 May 2013

History Hop Challenge.

Here it is, June 1st, Reveal day of the History Hop.


The early period of glass bead making, the first 1000 years or so, hold such a fascination for me it was a no brainer to choose Merovingian 500 - 751 AD as my period in time.

My Lampwork Beads with "Fibula" in the Background
I did a lot of research online and found lots of photographs and drawings.  I also visited the British Museum and saw some Merovingian pieces close up, (as well as some amazing Ice Age art. More about that later I hope.)
Merovingain women would have worn their gowns fastened at each shoulder with a very distinctive fibula type broach. Probably with a string of beads suspended between them. 

The Beads


Being a lampworker making glass beads in the styles I was seeing on the net was not a great problem. I had to mix different colours of glass rods together to get just the right colours for most of these beads. I also used sodium bicarbonate to give the aged look I was after. I wanted them to look as though they had just been exhumed.


The Seed Bead Fibula


Next came the fibula. This was my real challenge. The shape and sunburst style was so distinctive I knew I had to find a way to reproduce it. But I am not a metal smith and I knew I could not do it in glass.
My only real option was beadwork. And so I headed off to Lynn Davy and using her pattern for a Celtic boss I was able, after much cursing and tangled threads and a fair bit of help from Lynn, to redesign the pattern, and make this. The central bead is one of my lampwork lentils, made for the job.

I would have made two of these but I ran out of time.


The earrings are a poor approximation of the skilled metal work done by the smiths of the time, but as I said earlier, I am not a smith. Faceted cubes on simple ear hoops. The originals were filigree set with gems.
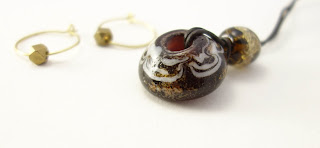


This squat conical bead  is a reproduction of a style found commonly from this time.

They were believed to be worn in this orientation but nothing I read said as pendants.  So this is my own interpretation. Threaded on a fine leather thong with a small crazed amber bead.


 Here is all my Merovingian Inspired work together. The half finished boss (right) is my prototype for the full one.


 A big shout out to Leah Curtis for organising this blog hop. My first ever. 

Thank you Leah, I have had a lot of fun.

Thanks for coming to see my blog. Feel free to visit all the other participants in this hop whose blog links can be found below. I can't wait to see what every one else has done.


Leah Curtis - Indus Valley - beadyeyedbunny.blogspot.co.uk
Laney Mead - Māori - laney-izzybeads.blogspot.co.uk
Becca - Art Nouveau - godsartistinresidence.blogspot.com
Melissa - English Romanticism and Mourning Jewelry - beadrecipes.wordpress.com
Tracy Stillman - Native American - tracystillmandesigns.com
Gerda - English Romanticism and Mourning Jewelry - gerdascraftsblog.blogspot.com
Liz E - Native North American - beadcontagion.blogspot.com
Ahowin - Māori (New Zealand)  - blog.ahowinjewelry.com 
Jasvanti - Indus Valley - jewelrybyjasvanti.blogspot.com
Lizzie - Art Nouveau - theneedtobead.blogspot.co.uk
Julia Hay - Merovingian - pandanimal.blogspot.co.uk
Dini - Celtic - angazabychanges.blogspot.nl
Caroline - Art Nouveau - blueberribeads.co.uk 
Charlie - Moche of Peru - clay-space.com/blog
Karin - China - maverickbeads.blogspot.com
Niky Sayers - Rome - silverniknats.blogspot.com
Marcia Dunne - Celctic and Mourning Jewelry - thealternativefoundry.blogspot.co.uk
anafiassa - Mesopotamia - anafiassa.blogspot.com
Kokopelli - Native American - kokopellidesign.blogspot.com
Christa - Native American - adventuresofwonebeadywoman.blogspot.com
Clair - Roman - obstinatepursuit.blogspot.co.uk
Susan Bowie - Native American - susanbowie.wordpress.com
Gloria Allen - English Romanticism - gloriaallendesigns.blogspot.com
Sheila Garrett - Early Russia - 4brownowl.blogspot.co.uk 

Thursday, 2 May 2013

Adventures with Fuji.


 I have been playing in the garden with my camera.


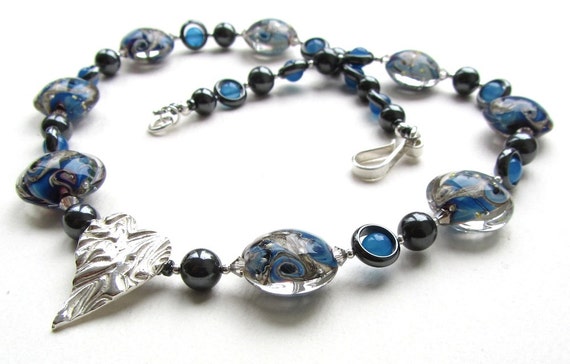
Lampwork Glass and Silver Necklace: My Heart is Blue For You Again
I am trying to improve the photographs I take of my beads and jewellery for my Etsy shop. 
No, these first two are not mine, they are what I aspire to. Lovely white back grounds that show off the true colours of the beads and have a light modern feel to them. These are the work of jewellery designer and fellow 'Craft Pimp Team on Etsy' member, Lynn Davy, whose shop can be found here Nemeton
The back grounds are uncluttered and white, the image is clean and crisp, the beads and silver sparkle and invite you to look more.

My first attempts.


ISO 100, F8, 1/1000 Macro mode
Same as left with fill light added
As left but with highlight added
These first photo I took on auto mode in bright sunlight.  Colour wise the beads are very close to the actual beads themselves but the back ground looks so grey and dull. But adding fill light has simply washed out the photo and made it look flat.The highlight seems to effect the background and leave the beads alone which is preferable to the fill light effect.


As left with fill light added

ISO 100, F8, 1/500 Macro mode

As left with highlight added
I tried shutter priority next but found I was limmited with how slow a speed I could choose. probably because of the bright sunlight. Again the colours of the beads themselves are OK, but the background is dull and seems to absorb them in. Highlight works better than fill light in PP.
ISO 100, F8, 1/680 Macro mode


Aperture priority seems to be a bit of a fail. It wouldn't let me make it any smaller than F8. and so, although the shutter speed is a little faster, the result is not much different from shutter priority.


Fill light

ISO 100, F8, 1/500

Highlight
These I took after setting a custom white balance from the paper itself.  These are the best so far. The colour of the beads is the best yet but the background is still not white, the white balance change seems to of added a rosy glow.


And Finally...


ISO 400, F32, 1/50
Fill Light

High Light
These where taken by my friend using her Nikon SLR inside a light tent but still in the bright sun in the garden. I like the absence of deep dark shadows around the beads. Will use the light tent from now on.
I would still like a little more crispness.........


The Highlighted version, cropped and sharpened.


 I feel as if I have been staring at these beads for far too long now and anything I do will not make them look right. I will have another go soon, play with the ISO and light tent and see how that works out.